Monday, December 24, 2007

Happy Holidays and Food Adventuring!

Happy holidays everyone! No matter how you celebrate, we hope everyone is enjoying their time with their families and friends. I just wanted to take some time from our holiday activities to give you a wrap up of our latest food adventures!

Recent food discoveries!


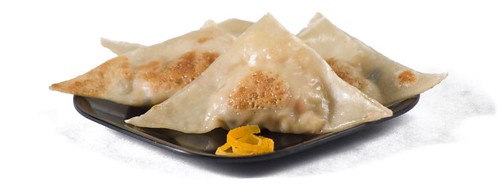
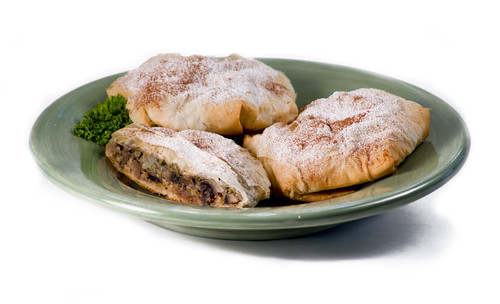
  • Better vegetarian dumplings! - I didn't have tofu on hand, so I used grated tempeh in my vegetarian dumpling recipe. Little did I know that the tempeh takes the dumplings to new gastronomic heights! Astoundingly, they were the best dumplings ever. I surely will post the improved recipe when we get a chance.

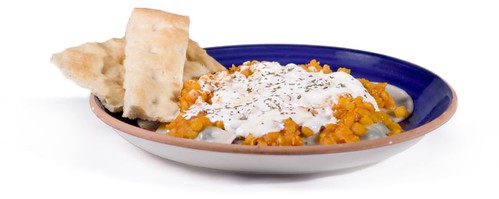
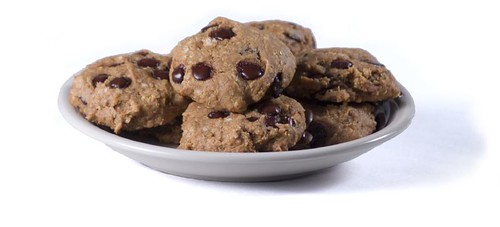
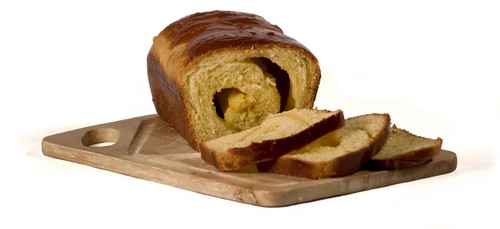
  • Bean pie! - Growing up, I'd seen bean pies in the local African American Muslim communities, but I never took the chance to buy one myself. My curiosity was rekindled when I saw a bean pie for sale in a Muslim owned by the slice pizza joint in DC. Thinking I'd rather make my own than buy a pie from a pizza joint of all places, I searched and decided to try this bean pie recipe. AMAZING! After tasting the results and seeing how easy it was to make, bean pie is now one of my favorite pies.

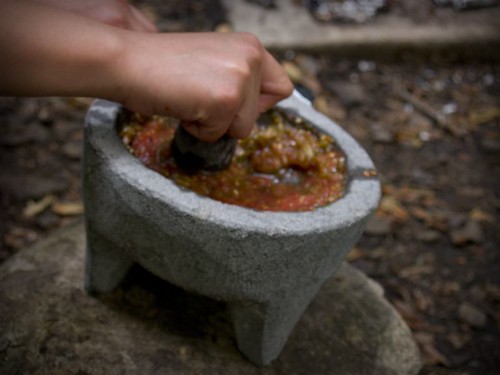
  • Piñon nuts! - Piñon nuts are simply pine nuts from a pine species native to New Mexico. On our big trip out west, we spend a couple days in Santa Fe where we had sampled some piñon nut ice cream, and man those nuts pack quite a pine nut punch. They are so much more flavorful and nutty than the everyday pine nuts used in Italy. We promptly popped into a grocery store and bought some piñon nuts (and hot sauce!) to take back. When we got home, we made the piñon nut brittle recipe on the back of the package, which turned out very well. Part of me wishes that I set some of the nuts aside to try the nuts in a pesto. That will be something new to try for next time!


Recent book discoveries!
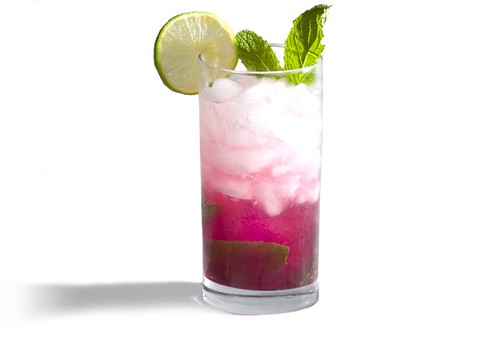


Saturday, October 20, 2007

Cooking Catchup

It's October already. The summer went by too fast. Things were supposed to slow down over the summer, so we could relax and rejuvenate. It certainly didn't feel that way. It was such a blur that Kevin and I missed our 2 year anniversary and didn't end up officially celebrating. (Though we did just happen to spend the entire day of our anniversary together having fun, so how could one possibly improve on that, really.)

But a constant through our daily hectic lives is that we've still been cooking together. We just haven't been posting. We're going to have to make more time to cook and grocery shop, now that our CSA season has ended this week. We'll miss the weekly dose of fresh basil. But we still have about 6 heads of garlic that we can savor through the winter and recall our wonderful vegetable experience this year. We got a pumpkin from the share, maybe I'll take a stab at pumpkin pie from scratch this year.

Recent unphotographed cooking experiments ...

  • Kadu (Afghan Kadu) based on this online recipe. We used half the sugar called for, since the dish is pretty sweet as is. STELLAR RECIPE. We made a vegetarian sauce by following the basic ingredient list of the meat sauce listed, but using a can of tomato sauce instead of fresh tomato, and omitting the meat (of course). For a quick yogurt sauce, we simply watered down some Greek yogurt, and added garlic.
  • Sweet Potato Bread based on this online recipe. We used more sweet potato called for, since we had extra mashed sweet potato, and also added some allspice along with the other spices. We also doubled the recipe, so we could share with friends. Everyone enjoyed it.
  • Vegetarian 'Crabcakes' based on this online recipe. Shredded zucchini replaces the crab very well in this recipe, the texture is spot on. Very quick and easy, we've made it several times over the summer. We've improvised 'bread crumbs' from smashed crackers, or didn't have lemon, and every time, the recipe still worked out well. We also have tried this recipe using summer squash instead of zucchini with good results. I'd say the color difference between the yellow squash vs green zucchini made the dish look more like real crabcakes, it almost fooled Kevin's roommate.
Recent books ...
  • The Soul of a Chef: The Journey Toward Perfection by Michael Ruhlman. I'm still in the middle of this book but so far it is stellar. If you like Top Chef (which we do!) You'll love this book. Very well written, and such detail captured that it literally feels like you are watching over these chef's shoulders. Highly recommended!
  • Horsemen of the Esophagus: Competitive Eating and the Big Fat American Dream by Jason Fagone. Kevin bought me this book for my birthday this summer. I must confess I was a bit of a fan of competitive eating ever since learning about Sonya Thomas a couple years ago, so the gift was a good choice. Unexpectedly, this book took me more behind the scenes than I thought it would, and it certainly changed the way I view competitive eating, and the competitors. I must add that reading it does not make one hungry for food or cooking. Barring side effects, it is a very good book.

Other news...
  • Kevin is going freelance! He has put in his 2 weeks notice at his current job, and he will be focusing on devoting time to photography and working on video projects that appeal to him. I'm so proud of him and I know he'll love his new career path!
  • Which takes me to my next point. We'll be going on a 2 and a half week vacation in November! We will fly to Kevin's hometown Tucson, and do a 4 corners road trip, ending back in Tucson in time to spend Thanksgiving with his family. I'm particularly excited since I've never seen the Grand Canyon before, nor stepped foot in New Mexico or Utah. We're crossing our fingers for favorable weather, but regardless, I'm sure we'll enjoy the natural beauty of it all.


Tuesday, September 4, 2007

Homemade Spaghettios!


Our local Trader Joe's has begun to sell this fantastic ring-shaped pasta called Analletti. The first thought that comes to mind when I came across this pasta was "Spaghettios!" As a child, Kevin adored spaghettios. I grew up disliking most cheese, so I hated them. If we were to look at a can of Spaghettios today we'd be shocked at the number of strange ingredients. From high fructose corn syrup to processed cheese, I can't fathom how Kevin could have loved it so much as a kid. Luckily, we're adults now and can make more informed decisions about what we eat. With less sodium, real cheese, and noodles cooked al dente, we think our homemade version is tops. Very quick and easy, and so much more wholesome. The sauce is cheesy, thick and smooth. This is a great base recipe, you could get creative and use other kinds of cheese and add veggies if you like! Let us know what you think!

1/2 lb ring shaped pasta
3 tbsp butter
3 tbsp all-purpose flour
2 cup milk
6 oz sharp cheddar cheese, shredded
1 8-oz can of tomato sauce
1 6-oz can of tomato paste
1/2 medium onion, finely diced
1/2 tsp oregano
1/2 tsp basil
1/2 tsp parsley
salt and pepper to taste

Cook pasta in boiling water, according to package directions, until al dente.
While the pasta is cooking, melt butter under medium flame in a saucepan. Add flour and stir about 2 minutes. Add onion to the saucepan, and stir to combine. Cook for 2 more minutes.
Whisk in milk, oregano, basil, and parsley. Bring to a gentle boil.
Whisk in the tomato sauce and tomato paste. If the sauce is too thick, add a ladelful of pasta water. Bring to a simmer.
Stir in the shredded cheese. Salt and pepper to taste
Finally, add the cooked, drained noodles and stir to combine well.

Serves 4.


Monday, August 20, 2007

BBM Package from Australia!


Imagine our delight to find our Blogging By Mail surprise arrived all the way from Sydney, Australia! The BBM organizer, Stephanie of Dispensing Happiness, paired us with the wonderful Steph of A Whisk and a Spoon. Interestingly, Steph grew up in Virginia, lived in New York for a while, and just moved to Australia this year. What a small world!

The box was PACKED with goodies. She included too much! (leftish to rightish):
A reusable grocery bag - This will prove handy on my impromptu grocery trips.
A postcard featuring a vintage cricket poster
A ceramic salt cellar - I have never used one of these, but it looks like it would be handy
Pink salt for the salt cellar - I looked it up, apparently this salt comes from underground saline water!
A copy of delicious. magazine - I'd never heard of this magazine but reading through it, it a top notch foodie must-read! Beautiful layout, recipes, interviews. I can see why Steph would include this as a fave.
A pack of chocolate malt balls - Mmmm. Need I say more?
Chocolate cookbook published by Australian Gourmet - These recipes look sooo good.
Chamomile and lavender tea - How did Steph know that Kevin loves tea?
A packet of wattleseed - a seed native to Australia, and often used in desserts, I'm looking forward to trying this!
Printed muffin cups - Just the handy excuse I need to make cupcakes ... Maybe something chocolatey from the cookbook she sent?

I've always dreamed of visiting Australia, and this package feels like it has to be the next best thing. Thanks Steph for such a thoughtful package and thanks to Stephanie for organizing it all. It was great to discover Steph's blog, and participate in such a fun event!


Saturday, August 4, 2007

A Visit to Bull Run Mountain Farm


As promised, here are some photos Kevin took from our visit to Bull Run Mountain Farm. We've been really happy to support this farm, and are enjoying all the wonderful organic vegetables. In addition to locally grown vegetables and herbs, we've gotten some fruits and even some honey! It was a great day to be outside and learning where our food comes from. The photo above is our farmer Leigh giving us a tour of the farm.

This is one of the fields right in front of the farmhouse.


And last but not least, is a peek into some vegetables we'll see later in the season. Pumpkin seedlings in the greenhouse!


Summer Update!

Hello! We haven't been able to find the time lately to post about our latest summer food adventures, so we thought we'd give you a quick update. As our jobs have been so busy and life creeps in, combined with tag-team sickness, it sometimes is rather difficult to post photos as quickly as we take them, so please bear with us. We've got a free day today to play some catch up!

On 07/07/07, we took a trip up to New York City, to see some music and find some good pizza. We ended up at Grimaldi's in Brooklyn. It was wonderful pizza, Kevin thought it was the best pizza he had ever had. Apparently the secret is a coal-burning oven? I've read conflicting reports about coal for cooking as it relates to pollution. If anyone knows the deal about coal, please chime in!

A couple weekends later, as we wrote about previously, we went to Ocean City, MD. It was a great weekend. We also attended the Chincoteague Blueberry Festival. It was a nice little sort of bazaar market. At the market, we had some wonderful Blueberry ice cream from the Island Creamery, and sampled some Blueberry shortcake. Unfortunately, the pints of fresh blueberries, and blueberry pies were ALL SOLD OUT! Ahh well, we still had a good time, and also bought some blueberry teas from the Eastern Shore Coastal Roasting Company. (The tea is very good, by the way!)

The following weekend, we attended our CSA shareholder potluck at the Bull Run Mountain Farm. The potluck was wonderful, and it was great to get a tour of the farm, and see where our produce was coming from, and how farming is done. We left with a new appreciation for the work that small farms put into bringing food to our tables. We are very happy to have supported the farm this year, especially with this summer's drought. We'll definitely be posting photos of the farm.

Also last but not least, we got our Blogging By Mail package from Steph of A Whisk and a Spoon. What a wonderful package it was, we'll be posting about this as well!

Stay tuned!


Wednesday, July 18, 2007

Weekend at the beach!

This weekend, we will be heading to the beach! We will be heading towards Ocean City, MD, and then spending much of our time in the Chincoteague, Virginia area. Not only are we looking forward to the wild ponies there, but we will also be there to see the offerings at the 2007 Chincoteague Blueberry Festival! So with that, we wish you all a wonderful weekend, and hopefully we'll come back with some good blueberry goodies!


Monday, July 9, 2007

Ashak


We've been so busy lately, we hadn't gotten around to finishing posting about the Afghan feast we had on Independence Day! We made Ashak, which are boiled scallion dumplings, with the Afghan Nan. It was a bit of work, but not unmanageable, and totally worth it. While the bread was rising, I was able to start the yogurt sauce, and the dumpling fillings. Instead of homemade yogurt, I opted for a quicker version, that was not as flavorful as the yogurt sauces that we've had in restaurants, but for us, it was quite good, and still complemented the dish well. Highly recommended, this is Kevin's favorite Afghan meal to order. The recipe is adapted from the Classic Afghan Cookbook by Mousa Amiri.

For the yogurt topping:
2 cups plain yogurt
1/2 teaspoon salt (or to taste)
1 clove of garlic, minced
dried mint (for garnish)

Line a strainer with a cheese cloth. Place the yogurt in the cheesecloth and let drain at room temperature for at least 3 hours.
After well drained, place the yogurt into a bowl. Add salt and garlic to the yogurt. Stir well, and put bowl in refrigerator.
Before using, add a little water to the yogurt, if it is too thick, and stir well.

For the dumplings:
3 bunches of scallions
1 lb frozen chopped spinach
2 packages of round wonton skins
1/4 teaspoon cayenne pepper
1 teaspoon salt

Slice the scallions 1/4 inch thick. Place in a colander and wash. Let drain for 15 minutes.
Sqeeze out all water from the spinach. Combine the scallions and spinach into a mixing bowl. Add the salt and cayenne. Mix well.
Using water as 'glue', brush a little water on the edge of a wonton.
Place 1/2 tablespoon of the filling in the center of the wonton.
Fold the wonton skin over the filling, and seal the edges, making a half-moon shape. Continue making dumplings until the filling or dumplings are used up. (Most likely the filling will be used up first.)

For the peas topping:
1/2 lb dried yellow split peas
1 onion, finely chopped
1 large clove garlic, minced
1/4 cup vegetable oil
1/4 cup tomato sauce
1 tomato seeded, finely chopped
1/2 teaspoon black pepper
1 teaspoon salt
2 cups water

Sautee the onion with the oil until lightly browned. Add the peas, garlic, black pepper and water.
Simmer until the peas are tender.
Add the tomato, tomato sauce, and salt. Simmer for 10 more minutes.

Assembling the dish:
Bring a large pot of water to a boil. Add salt and vegetable oil to the water.
Add 10 to 12 dumplings to the water. Let cook for 3 minutes and then remove to a plate.
Top with the peas topping, and then the yogurt topping. Sprinkle the dried mint over the yogurt.
Repeat for another plate of dumplings.

Serves 6 to 8 hungry people.


Afghan Nan

This was a simple bread from the Classic Afghan Cookbook. I've adapted the steps and amounts to what I used. This nan is traditionally cooked in a tandoor, like Indian naan, but the flavor is much more like a light pizza dough. The bread has parallel grooves, that give a unique look and texture. The bread is pictured with in our Ashak post.

2 1/2 cups unbleached all purpose flour
1 cup warm water
3 grams dry yeast (or half a packet)
1/2 teaspoon baking powder
1/2 teaspoon salt
1 tablespoon vegetable oil

In a bowl, mix the yeast with the water.
Add the flour, baking powder and salt. Mix well and knead for 10 minutes.
Cover the dough and let it rise for one hour.
Preheat oven to 450 degrees. Liberally grease a baking sheet with the vegetable oil.
With wet hands, spread the dough flat onto the baking sheet. Flatten the dough out so that it is uniform thickness, and covers the entire baking sheet.
With wet fingers, run your fingers down the dough in a straight line, pressing and releasing every inch or so, to form wavy up and down grooves down the length of the dough.
Bake for 15 minutes, or until the bread is slightly golden.
This bread is great straight from the oven, or lightly toasted after cooling.


Friday, July 6, 2007

Classic Afghan Cookbook


Our love of Afghan food started a few years ago when friends of ours invited us to eat at the renowned Helmand restaurant in Baltimore. The restaurant is owned by the brother of Afghanistan President Karzai, and naturally, everything we tasted that night was unforgettable. Since then, we've explored other Afghan restaurants closer to us. (We highly recommend Bamian in Falls Church. Very delicious and so much closer to us than Baltimore!) Dishes like Kadu, (sweet baby pumpkin), Ashak (scallion dumplings) and Naan (traditional bread) relieve our hunger pangs, but also feed our addictions for Afghan food.

The next sensible progression of our fascination with the tastes of Afghanistan is to cook it ourselves! One of my most recently acquired cookbooks is the Classic Afghan Cookbook. The author, Mousa Amiri, owns a popular Afghan restaurant in Sacramento, and the recipes looked so good, we had to give it a shot. So on this past 4th of July, we celebrated with an Afghan feast! Stay tuned for a post on the dishes we made from this cookbook!


Saturday, June 30, 2007

Rainbow Couscous Salad

We haven't photographed anything in a while, but that doesn't mean we haven't been cooking. We brought this very colorful couscous salad to a family barbecue and everyone loved it. We were responsible for bringing a couple vegetarian dishes to a family barbecue last weekend, so we made a great light and creamy cole slaw and this couscous salad that follows. The dish is inpired by a couscous salad I had once at Marvelous Market, a local bakery/cafe chain that's a bit overpriced. We'll be photographing again soon, for now enjoy this light and delicious salad!

1 lb israeli couscous (uncooked)
1 1/2 cups vegetable stock
1/2 cup golden raisins
3/4 cup pesto (basil, or whatever pesto you have on hand, no cheese)
1 red pepper, diced
1/2 red onion, diced
1 cup grape tomatoes, halved

Bring the vegetable stock and raisins to a boil. Once boiling, add the couscous, and simmer, covered for 10 minutes.
Once the couscous is al dente, stir in the pesto, until well combined.
Lastly, stir in the remaining vegetables.
Enjoy warm or cold.

Serves 8.


Monday, June 18, 2007

Blogging By Mail


Apologies for the lack of posts lately, summer excursions have distracted us from our usual 'blog night'. Anyhow, we wanted to take a minute to tell you about a neat blogger event that some of you might be interested in joining. Happy Sorceress Stephanie is hosting the latest Blogging By Mail event called A Few of My Favorite Things. Blogging by mail is kind of like a 'Secret Santa' where someone far away prepares a package of their favorite goodies, while you prepare a package of your favorite goodies to send to someone else. This is our first time joining Blogging By Mail, and we're looking forward to it! If you have a blog, and are interested, by all means, you should check it out, Stephanie is accepting participants through July 5!


Monday, June 11, 2007

Sorrel Pesto with Pasta

Kevin's away on a work trip for a few days, so no photos for a bit. While he's away, I thought I'd post about this really great sorrel pesto I made last week. Kevin was working late, and there was a ton of sorrel to be eaten from our CSA share. Having never cooked with sorrel, we were pleasantly surprised by the citrus tang. I did not have any pine nuts on hand, so I substituted with sliced almonds. The almond gave the pesto a nice nuttiness and worked quite well. We had it with our favorite spaghetti - Trader Joe's Spaghetti Lunghi (the best super long pasta ever!) and it was great. Highly recommended!

4 cups sorrel, ribs removed
2 cloves of garlic
1/3 cup olive oil
1/4 cup grated parmesan cheese
1/4 cup sliced almonds
1 pound of dry pasta

Cook the pasta al dente according to the directions, setting aside 1 cup of the pasta water before draining, and returning the drained noodles to the empty cooking pot.
Toast the almonds in a shallow pan for a few minutes, stirring often.
Place sorrel, garlic, almonds, parmesan cheese and olive oil in a food processor. Process until smooth.
Add the pasta water to the pesto and mix until blended. Pour mixture over the pasta and toss to coat well.

Serves 6 to 8.


Thursday, June 7, 2007

Campfire Salsa


Since our Tucson trip last month, I'd been dying to make a salsa using a good molcajete (the traditional Mexican mortar and pestle). What better time to make salsa than on a camping trip? You can roast the tomatoes and peppers over the fire and with a molcajete, clean up is a breeze! Just rinse with water, no soap. When buying a molcajete, be sure to choose one of quality, made from lava. The porous rock absorbs flavors and helps to season future salsas and guacamoles. So here's a very simple recipe for salsa that we used on our camping trip. Of course, you could make salsa without a molcajete, but many claim that this tool is essential to getting the correct slightly chunky texture.

vegetable oil
2 jalapeno peppers (use less or more for your heat preference)
2 cloves garlic
4 plum tomatoes
2 tablespoons, finely chopped white onion
1 tbsp cilantro, finely chopped (optional)
salt to taste

special equipment needed:
molcajete

Lightly coat the peppers and tomatoes with the oil.
Roast the serrano and jalapeno peppers, and tomatoes, turning so that all sides char.
Remove the peppers and tomatoes from heat and remove the skin, using a bowl of cold water. If you desire a less spicy salsa, remove the seeds and white pith from the peppers.
Crush the peppers and garlic together in the molcajete.
Add the tomatoes one at a time and mash until the consistency desired is achieved. Lastly add the onion and cilantro. Mash slightly to mix in.
Serve straight from the molcajete.

Makes about 2 cups of salsa.


Sunday, June 3, 2007

Almost Guiltless Cookies


As mentioned previously, we camping with a bunch of our friends this past weekend. To jumpstart the trip, I thought I'd make some very wholesome cookies. I found this peanut butter banana cookie recipe that used peanut butter instead of oil or shortening, and thought I'd give it a try with some modifications. Seizing the opportunity to experiment, I used carob chips instead of raisins, and I used quinoa flakes instead of the oats. I had never cooked with either ingredient before, but I'm pretty please with the results. The cookie is a moist, not too sweet cakey cookie. The peanut butter and banana taste is definitely there. The quinoa flakes are much smaller than rolled oats, so the flakes sort of disappear into the cookie, while adding a slight nuttiness. Unfortunately, even though I used vegan carob chips, the recipe called for eggs. And while quinoa flakes are typically used for gluten-free diets, the recipe uses whole wheat flour. I guess not being able to call the recipe vegan or gluten free is where my guilt comes in. But while eating it, zero guilt. It's like eating the best energy bar ever.

2 banana, peeled and mashed
1 cup peanut butter
1/2 cup evaporated cane sugar
1/2 cup packed brown sugar
2 eggs, beaten
2 cups whole wheat flour
1 teaspoon baking soda
1 cup quinoa flakes
1 cup carob chips

Preheat oven to 325 degrees.
In a medium bowl, stir together mashed banana, peanut butter, cane sugar and brown sugar until smooth. Mix in the eggs.
Sift together the flour and baking soda.
Add flour and baking soda, mix until just blended, then stir in the quinoa flakes and carob chips until well distrubuted.
Line a baking sheet with parchment paper. Place rounded spoonfuls of batter an inch apart on the parchment paper.
Bake for 11 to 13 minutes. These cookies do not brown on the tops, do not overcook.

Makes about 30 cookies.


Saturday, June 2, 2007

Gone camping

Hey the last week's been crazy, so this weekend we'll be letting loose of our urban stress by camping in the Catoctin Mountains. Stay tuned for foods we're taking with us and my latest cooking outdoors experiment!


Monday, May 28, 2007

Prickly Pear Cactus Mojito


As I had mentioned a few weeks ago, Kevin and I went to Tucson and while we were there I brought back a souvenir ingredient to try out. Here it is, we made a southwestern twist on the classic mojito. Instead of simple syrup, we used prickly pear cactus syrup! The syrup gives the drink a wonderful magenta and a mild fruity background. It's a very nice, refreshing combination, you should try it!

1 1/2 tablespoon prickly pear cactus syrup
6 to 8 spearmint leaves
juice of 1 lime (about 2 ounces)
2 ounces rum
1 to 1/2 cups cubed or crushed ice
2 ounces club soda

In a tall glass, place the mint leaves, lime juice and the cactus syrup.
Muddle the leaves for 20 seconds to release the mint oils using either a muddler or a wooden spoon.
Add the rum, and stir.
Fill the glass until 3/4 full with ice.
Top off with the club soda club soda.

Makes 1 mojito.


Tuesday, May 22, 2007

We're on the Foodie BlogRoll!

I don't know if you have noticed, but we've added a wonderful little widget to the right, called the Foodie Blogroll. It all stemmed from a wonderful idea started by Jenn of Leftover Queen, to get a bunch of great food oriented blogs to link to each other. It's only a week old and it seems to be growing at an astounding rate! I invite all of you to check out some of the blogs listed. We're happy to be on the list, and many thanks to Jenn for all her hard work in gathering all these blogs together and maintaining the list!


Click to Join the Foodie Blogroll


Monday, May 21, 2007

Sunflower Vegetarian Restaurant - Falls Church now open!


Attention all metro DC vegetarians! (And omnivores as well!)
Sunflower Vegetarian Restaurant has just opened a new location in Seven Corners, Falls Church. This new location is bigger, sleeker and just as wholesome as the Fairfax spot! Opened this past Tuesday, expect small hiccups, but as always very tasty fare. We had the pleasure of dining there tonight. The dining room was hopping for a Monday night, we think this location will serve the community well.

All the meals served at Sunflower are vegetarian and deliciously prepared pan-Asian specialties with wholesome ingredients and no artificial flavors. Omnivores usually can find something tasty to eat on the menu without missing the meat. This new location boasts several private booths and a couple of rooms for private parties. There were several new menu items, appetizers such as the Japanese BBQ Kebob, a nicely grilled flavorful medley of veggies and meat substitutes served on a bed of greens. Kevin had the mu tea, and a jinenjo soba noodle dish. I ordered perhaps my favorite dish from them so far, a Sunflower Specialty called the Songbird, fresh chunks of soy protein and wheat gluten lovingly dressed in a sweet spicy sauce. Paired with the smokey, fruity longan and jujube tea, the meal was fantastic. Even in its first week of operation, Sunflower exceeded all expectations. The Fairfax location has a much more homey feel, but we like the fact that this restaurant is only a mile away from us! Now we have even more reasons to frequent this wonderful vegetarian restaurant. Check it out!

Sunflower Vegetarian Restaurant
6304 Leesburg Pike, Falls Church, VA
703-237-3888

Note: The Sunflower website has not been updated with all the information about the Falls Church location, or the expanded menu.

Photo image by alitaylor on stock.xchg


Thursday, May 17, 2007

We got a CSA Share!

Across the city, farmer's markets are opening and Kevin and I have been pretty keen on trying to wake up early on Saturday to hit them up. The key word is 'trying'. After our exhausting work weeks, and trying to relax with friends on Friday night, and needing a break from the annoying alarm clocks, it has been pretty hard for us to get up early enough on Saturday mornings to head down to the farmer's market.

But all is not in vain! Fresh local vegetables are now within our reach, because we signed up for a CSA share! CSA stands for Community Supported Agriculture. Participating farms divvy up their crops into shares for consumers like us to purchase. By signing up, we get to have fresh vegetables delivered weekly (for about 5 months) to convenient pickup locations. We also guarantee the farmer a more stable income despite what Mother Nature may have in mind. The vegetables arrive at their peak and when in season. CSA shares are a great way to support local farms, eat more local foods and get the freshest produce. More and more farms are participating each year, so look in your local area for listings.

If you're in the DC metro area, here are some helpful links.

Northern Virginia CSA Farms
DC CSA Farms
Maryland CSA Farms

Our share is with an organic farm in Virginia called Bull Run Mountain Farm. This is our first foray into the world of CSA, and we're very excited. We're hoping that having all these fresh vegetables available to us will help us eat more healthily, and surely these foods will affect the recipes that we blog about here.


ps - Even with all these veggies, we still want to wake up and get ourselves down to the Farmers Markets eventually!


Wednesday, May 16, 2007

Mastering the Art of French Cooking

Mastering the Art of French Cooking

Kevin's been spending a few weekends volunteering at the WETA-FM 90.9 telethon drives. While he was there he got me a gift! Julia Child's Mastering the Art of French Cooking.
Because of my lack of upbringing with American home cooking, I am not sure if I can fathom how influential this book was to American cuisine. Originally published in 1961, this book was a huge breakthrough. The writing is clear and concise, the information is so useful. Thinking about all the other books I've perused, I can't think of any other cookbook that has laid things out in such a sensible manner. It is not surprising that this book has become the standard in cookbook writing. The recipes are so tempting, with variations of preparation and presentation. All without the aid of color photographs!

Never having been to France, and having only eaten French meals at a few restaurants, my depth of knowledge on French cuisine is slim. (Does watching Julia and Jacque count?) Needless to say, I've learned a lot about French cuisine from this book. Every kitchen should have it. And of course, if you own it, perhaps this post will serve as a reminder to dust it off and make some recipes out of this oldie but goodie.

Look forward to adaptations on some of these French dishes on the blog!


We went on vacation and we forgot to tell you! Oops!

Sorry about that, we're back now. We spend a week in Tucson, Arizona to attend a beautiful wedding and see Kevin's wonderful parents and brother. (Congratulations Micah and Laura!) I brought home a surprise ingredient, which we'll be making something with shortly, too, so stay tuned for that. It was great weather out there and we got back last week, and then have such great weather out here. We will be attending another wedding this weekend, so recipe posts are going to be slim for a little bit. In the mean time, we're going to alter format slightly and start incorporating posts featuring cookbooks, ingredients, local businesses and other blogs. Recipes too, of course, but other content to shake things up a bit! Hope you like it, and let us know if there's anything you want to see on the blog. Thanks!


Tuesday, May 1, 2007

Potsticker Dumplings


Kevin has had a hankering for dumplings lately. It's so easy to buy vegetarian dumplings frozen from the store or order them in a restaurant, but also very disappointing to find that they usually are filled with flavorless cabbage and disgusting MSG. Well, we've had ENOUGH! We are making our own potsticker dumplings. It's a little time consuming, but well worth it. They will have NO CABBAGE AND NO MSG. Just wonderful flavors and textures that we like, and we're making a ton so that we can freeze it and have plenty for future meals. Plus, you can steam them, pan fry them (like we did here) or deep fry them as crispy wontons. In this recipe, we add enough seasoning to the filling that a dipping sauce is unnecessary, you may adjust for your own palate. An interesting touch I learned from my mother is to include jicama into the mix. Jicama provides a slightly sweet and light crunch that really takes these dumplings to another level. The filling recipe can also be used for eggrolls, steamed buns (banh bao), etc. This is also a great recipe to get kids in the kitchen, I remember my brother and I having fun filling the dumplings and rolling up eggrolls. They're fun to make and fun to eat!

For the filling:
32 ounces firm tofu (drained, crumbled and pressed to remove as much water as possible)
2 medium onions finely diced
1 large carrots, grated
10 ounces of various mushrooms (oyster, enoki, etc), finely chopped
1 medium jicama finely diced
1/4 cup fresh leafy herbs such as wild betel (la lot), thai basil, or cilantro, finely chopped
1/3 cup soy sauce
3 tablespoons hoisin sauce or plum sauce
2 tablespoons vegetarian oyster sauce or mushroom sauce
1 tablespoon sriracha sauce or other hot chili sauce
1 1/2 tablespoon grated ginger
salt and pepper to taste

Place the crumbled tofu into a large mixing bowl. Add the onion, carrots, mushrooms, jicama and herbs to the tofu and mix well.
In a small bowl, mix the soy sauce, hoisin sauce, oyster sauce, sriracha sauce, and ginger.
Pour the soy sauce over the tofu and mix to distrubute the sauce.
Salt and pepper to taste.

Making the dumplings:
150 potsticker/gyoza/wonton wrappers (about 3 packages)
water
1 filling recipe above

Lay a pot sticker wrapper on a flat surface. Brush edges of the potsticker with the water. Place 1/2 tablespoon of filling in the center of the potsticker. Fold the wrapper over the filling, making sure there are no air bubbles. Press down the edges to seal. Set aside dumpling and continue to use the rest of the wrappers and the rest of the filling.
To freeze the dumplings for future use, arrange the dumplings in one layer on parchment lined baking sheet so that the dumplings are not touching. Place baking sheet in freezer. The dumplings are ready to put in a freezer bag once fully frozen.

Pan frying the dumplings:
vegetable oil
water
dumplings from recipe above

Add about 1 teaspoon vegetable oil in a skillet on medium flame, and shimmy the pan to distribute the oil throughout. Add about 8 dumplings to the hot pan in a single layer.
Cook for two minutes or until nicely browned (takes longer if using frozen dumplings). Turn the dumplings and cook one minute to brown the other side. Add about 2 tablespoons of water to the pan, and immediately cover skillet with lid.
After a minute or two, all the water should be absorbed and cooked away. Remove dumplings to serving plate.
Repeat pan frying for the rest of the dumplings.

Makes about 150 dumplings.


Monday, April 23, 2007

Craquelin


Our talented friend Kyle recently finished baking school this year. He was kind enough to join us this weekend for the blog. We were excited, as this was our first time to see Kyle 'in action' and we'd heard such good things. Together, we decided to make a Belgian bread called a craquelin. It is a brioche with orange flavored sugar cubes, that give the bread a nice crunch, hence the name craquelin! Kyle has scaled down and adapted the classic recipe to suit the home oven. We made the bread in loaf pans, in the style of a swirl bread. This bread is great warm and also cold (when the sugar crystallizes and gets crunchy). While this is probably the most time-consuming recipe on this blog so far, Kevin says this bread is his favorite so far. Indeed, the bread was worth it. Buttery, sweet with a great orange zing. So we thank Kyle so much for his expertise, we definitely hope to have him cooking with us again in the future! This timely blog post is our contribution to the Waiter There's Something In My... Bread food blogging event hosted by Spittoon Extra. The roundup can be found here.

500g unbleached all-purpose flour (about 4 cups)
50g cold water (1/4 cup)
70g sugar (1/3 cup)
250g cold eggs (5 whole large eggs plus one yolk)
12g salt (2 tsp fine sea or table salt)
250g cold unsalted butter (2 sticks plus 2 Tbs = 18 Tbs)
30g fresh yeast or 12g instant yeast (such as "RapidRise" -- 1 and
3/4 packets)

1 small box sugar cubes
zest of 3 oranges
1/4 cup orange liqueur (Grand Marnier, Cointreau, etc)

1 egg, beaten (for egg wash)

Special equipment needed:
stand mixer with dough hook
two 9" x 5" (1 lb.) nonstick loaf pans
pastry brush

  1. Add eggs and water to mixer bowl. Sprinkle yeast on top, then add flour.
  2. Mix on lowest speed for about two minutes until the flour is evenly hydrated.
  3. Add salt and sugar. Mix at lowest speed for another two minutes until well incorporated.
  4. Increase mixer speed to next setting. Mix until dough is well developed. The dough should pull away from the bowl and have a smooth appearance. When tugged on, it should feel stretchy, and you should be able to make a good "window" in the dough. Depending on your mixer and your dough, this could take anywhere from 2 to 10 minutes.
  5. Using a rolling pin, or some other heavy object, pound the cold butter to soften it. It is important than the butter not get too warm or it will melt.
  6. With the mixer on the lowest speed, slowly add the butter, about one tablespoon at a time, until it is all incorporated into the dough. Do not add the next piece until the previous piece has been fully incorporated. This can take anywhere from 10 to 20 minutes.
  7. The dough should now appear smooth and feel soft and elastic. Move it to an oiled container that is at least three times as big as the dough. Cover the container with plastic wrap or a lid. Do not cover with a towel and do not press the plastic directly against the dough. Let sit for one hour at room temperature.
  8. While the dough is rising, combine the zest and orange liqueur. Pour mixture over sugar cubes and mix to evenly distribute the liqueur and orange zest. Let the sugar cubes macerate while the dough rises.
  9. After the dough has risen for one hour, lightly dust the top with flour then turn it out onto the counter. Gently press the dough down with the palms of your hands to eliminate any large air bubbles. Using both hands with your fingertips touching, reach under the far edge of the dough. Fold that third into the center. Fold the near edge third towards the center. Turn 90 degrees and repeat folding thirds to the center. Return the dough to the bowl with the seam side down and the tighter, smooth side up. Cover and let sit for another 45 minutes.
  10. After 45 minutes, turn your dough back onto the counter and cut into two. Working with one half at a time, use your palm to gently press the dough down to remove any large bubbles. Gather the dough into the center by grabbing the edges and pulling them towards the center, like making a bundle out of a handkerchief. The dough should stick to itself. You should have a loose ball. Turn it over and cupping the ball with your thumbs and fingers, roll the ball against the counter to tighten it. If you see the surface of the dough tearing, stop, you are overtightening it. Repeat with the second ball of dough. This is called preshaping the dough and helps build structure in the final loaf.
  11. Allow the dough to relax for 5 minutes. Working with one piece at a time, lightly flour your work surface and using your hands or a lightly floured rolling pin press the dough out into a rectangle about 9 inches wide (as wide as your loaf pan is long) and 18 inches long. Be gentle! We don't want to press all the air out of the dough.
  12. Take about half your sugar cubes and gently press them in an even layer into the surface of the dough, leaving a one inch blank space at one of the narrow edges.
  13. Working from the opposite end of the blank space, roll up the dough into a log, making sure to keep the log tight as you go. When the roll is finished, gently pull it against your work surface with your fingers to tighten the log and the seam.
  14. Lightly oil your loaf pans and place one log, seam side down, into each pan.
  15. Lightly brush the surface of each loaf with the beaten egg wash.
  16. Cover each pan with plastic wrap, again, not directly against the surface of the dough. Let sit for 45 minutes to an hour at room temperature. The dough is "proofed" when the dome of it has risen nearly to the top of the pans. While the dough is proofing, preheat your oven to 350 degrees.
  17. When your dough is proofed, give it a second egg wash then bake for 40 minutes on the middle rack of your oven. You may want to place a foil-lined sheet pan on the next rack down to catch any sugar that may bubble out of the loaf pans. Do NOT open the oven for the first 30 minutes, doing so will decrease your loaf volume.
  18. Remove to a cooling rack. Let sit 10 minutes in pans, then remove from pans, running a knife around the edge to loosen first. Enjoy warm or let cool thoroughly on racks before wrapping in plastic for storage.


Monday, April 16, 2007

Reuben Sandwich


We've been dying to make this vegetarian Reuben. Very quick, easy to make, and was a great dinner. The sandwiches were so good, we decided to make it again for lunch the next day! It was a hit with our omnivore friends, too. Instead of corned beef, we use sauteed mushrooms and sun-dried tomatoes. The sandwich is just bursting with flavor and the tomatoes really complement the tangy sauerkraut and Russian dressing. We actually used this vegan Russian dressing recipe. We cut the amount of oil in half to make the dressing lighter and it turned out very well. Make sure to use a vegetarian Worcestershire sauce.

10 ounces portabello mushrooms, sliced
4 tablespoons vegetable oil
salt and pepper to taste
4 ounces sundried tomatoes, jarred in olive oil, drained
4 ounces sliced Swiss cheese (about 4 slices)
1 heaping cup of sauerkraut
8 slices jewish rye bread
1/2 cup russion dressing
oil for pan toasting

In a large skillet, heat the 4 tablespoons of vegetable oil over medium flame. Add the sliced mushrooms and sautee until cooked. Salt and pepper to taste. Set aside.
Slice the sund-ried tomatoes into strips, about 1/4 inch thick.
On a plate, lay a slice of bread. Place 1/4 of the mushrooms on the bread. Evenly distrubute 1/4 of the sun-dried tomato strips on top of the mushrooms. Top with a slice of Swiss cheese and then 1/4 of the sauerkraut. Spread Russian dressing onto the underside of a second slice of bread and place on top of the sandwich.
Repeat making sandwiches with the rest of the ingredients.
In a pan, heat 2 tablespoons of oil over medium flame. Place sandwich in the pan, and let toast for 3 minutes (or until sufficiently toasted). Carefully flip sandwich and cook other side similarly.
Repeat pan toasting the other sandwiches. Serve immediately and enjoy!

Makes 4 Reuben sandwiches.


Saturday, April 7, 2007

Vegetarian Bastilla


I can remember the first time I tried Bastilla. The combination of savory, sweet and cinnamon was unforgettable. It instantly became is one of our favorite Moroccan dishes. But because it is traditionally made with pigeon (chicken in the America), it's been a long time since we've had it. This month's mingle Arabian Nights reminded me that I should try to create a vegetarian version that we can enjoy. Our version is less time consuming than any of the chicken recipes I've seen online. This is our first mingle, and we're pretty excited. Give it a try and tell us what you think!

3 tablespoons olive oil
12 ounces portabello mushrooms, sliced
1 large onion, diced
1 1/2 teaspoons grated fresh ginger
pinch of saffron
1 1/2 teaspoons ground cinnamon
1/2 cup chopped parsley
1 tablespoon of lemon juice
1/2 cup vegetable broth
4 eggs
salt and pepper to taste
2/3 cups raw sliced almonds
1 tablespoons evaporated cane sugar
1/4 cup oil (for brushing)
1 8-ounce pack of phyllo dough (defrosted)
confectioner's sugar (for garnish)
ground cinnamon (for garnish)

Preheat oven to 400 degrees.
In a pan over medium flame, heat the olive oil.
Add the mushrooms and onions. Cook until onions are just softened. Add the ginger, saffron, 1 teaspoon of cinnamon, lemon juice and chopped parsley.
In a bowl, beat the eggs with the vegetable broth. Pour this mixture into the pan of mushrooms, and stir constantly, until the eggs curdle and are evenly distributed in the mixture and most of the liquid is cooked off. Salt and pepper to taste. Set aside.
Toast the sliced almonds in a frying pan, stirring frequently, until lightly browned. Add the sugar and the remaining 1/2 teaspoon cinnamon, and toss lightly. Let cool. Pulse in food processor until finely ground.
Lightly grease a baking sheet.
Lay 3 sheets of phyllo dough on a plate. Brush oil on the phyllo. Add 2 more sheets and brush with oil.
Place about a half cup of mushroom/egg mixture in the center of the phyllo in about a 5 inch circle. Sprinkle 2 to 3 tablespoons of the ground almonds on top of mushrooms. Fold over the edges of the dough over the filling to complete enclose. Brush the seams with more oil, and place seam side down onto the baking sheet. Brush the top with more oil.
Continue with the rest of the filling and dough.
Bake for 25 minutes or until the pastry is golden and crisp.
Lightly dust with confectioner's sugar and cinnamon.

Makes 4 medium sized bastilla.


Tuesday, April 3, 2007

Mint Chocolate Ganache & Chocolate Frosting

This is based on your basic ganache recipe. Ganache at room temperature can be used to pour over cakes for a smooth shine. Chill the ganache and whip it up for a rish frosting. Chill for longer and use for truffle fillings. I used plain chocolate ganache for the frosting, and mint chocolate ganache for the outer glaze on a mint chocolate cake for Kevin's birthday. It's a good idea to smooth frosting over any rough edges of the cake before pouring over the ganache glaze.

Chocolate Frosting


6 ounces semisweet chocolate chips
3 ounces 70% dark chocolate
1 cup heavy cream
1 tablespoon dark rum

Place all the chocolate into a medium bowl. Heat the cream in a small sauce pan over medium heat. Bring to a boil and immediately remove from heat.
Pour over the chocolate, and whisk until smooth. Stir in the rum.
Let cool to room temperature, then refridgerate for 15 minutes until the ganache is set. Whisk with an electric beater until light and fluffy.

Mint Chocolate Ganache Glaze


6 ounces semisweet chocolate chips
3 ounces mint chocolate
1 cup heavy cream
1/2 tablespoon peppermint extract

Place all the chocolate into a medium bowl. Heat the cream in a small sauce pan over medium heat. Bring to a boil and immediately remove from heat.
Pour over the chocolate, and whisk until smooth. Stir in the peppermint extract.
Let cool to room temperature. Pour over cake, starting in the center and using a spatula to work the glaze outward.


Mint Chocolate Birthday Cake for Kevin!

Last Thursday was Kevin's birthday and he asked me to make him a mint chocolate cake! I was surprised to find that this vegan cake recipe is so incredibly good! The ganache/frosting we used, while not vegan, was the perfect complement. This cake was great with a scoop of vanilla ice cream. No pictures this time, we were too busy enjoying Kevin's birthday (and the cake)!

3 cups all purpose flour
1/2 cup unsweetened cocoa powder
2 teaspoons baking soda
1 teaspoon salt
2 cups cold water
2 cups sugar
3/4 cup vegetable oil
1 tablespoon vanilla extract
1/2 tablespoon peppermint extract
1 1/2 cups (about 10 ounces) mint-flavored chocolate chips

Preheat oven to 350°F. Grease and flour three 9-inch-diameter cake pans with
1 1/2-inch-high sides. (Or take things easy on yourself and use greased parchment paper!)
Sift flour, cocoa powder, baking soda and salt into medium bowl.
Mix 2 cups cold water and sugar in large bowl until sugar dissolves. Mix in oil, vanilla extract, and mint extract. Whisk in dry ingredients. Divide cake batter among prepared pans.
Bake cakes 25-30 minutes. Cool cakes in pans. Cut cakes around edges of pan. Turn cakes out onto racks and cool completely.


Sunday, March 25, 2007

Panzanella


Croutons are one of the best things about salad. Unfortunately, croutons are not a mandatory element of most salads. This is why Panzanella, an italian bread salad, is one of our favorites. Basically anything can go into this salad, but the crusty croutons are a must! It's a great way to use day old bread, and you can even make extra croutons for use later. You can use whatever ingredients you have on hand. We like to use lots of tomatoes, cubed mozzarella and sauteed portabello mushrooms. Also, it doesn't hurt to go heavy on the croutons!

3 cups romaine lettuce, washed and cut into bite-sized pieces
1 1/2 cups radicchio, washed and cut into bite-sized pieces
5 medium tomatoes, seeded and diced and drained
8 ounces of mozzarella cheese, cut in 1/2 inch cubes
6 ounces of portabello mushrooms, cleaned and sliced
2 tablespoons olive oil
5 cups of croutons (recipe below)
1/2 onion (red or white), finely diced
1 clove garlic, finely minced
1/3 cup balsamic vinegar
1/3 cup extra virgin olive oil
1/4 cup parmesan cheese, finely grated
6 leaves of fresh basil, cut in fine chiffonade
salt and pepper to taste

In a large salad bowl, place the romaine, radicchio, tomatoes, and mozzarella.
In a small container with a top, mix the olive oil and balsamic vinegar. Place top on container and shake well. Add the onions and the garlic marinate in the dressing for 5 minutes. Add salt and pepper to taste to the dressing.
In a hot skillet, add 2 tablespoons of olive oil. When the oil is hot, add the sliced mushrooms. Sautee until cooked, do no overcook. Salt and pepper to taste. Let cool and place in salad bowl as well.
Add the croutons to the salad and toss.
Shake dressing in container before pouring over the salad. Toss salad gently. Sprinkle with parmesan and basil.

Makes 4 entree servings

For the croutons:
10 oz crusty italian bread
1/4 cup extra virgin olive oil
1/2 tsp dried oregano
1 clove garlic, finely minced
3 tablespoons parmesan cheese, finely grated
salt and pepper to taste

Preheat oven to 400 degrees. Mix together the olive oil and the oregano and minced garlic.
Cut bread into 3/4 inch cubes, and place into large bowl.
Pour the olive oil mixture over bread and the parmesan cheese and toss the bread cubes until evenly coated.
Spread the bread cubes on an ungreased baking sheet in a uniform flat layer. Salt and pepper to taste
Bake for 10 minutes or until the cubes are golden and crunchy, gently turning the croutons halfway during cooking time.


Tuesday, March 20, 2007

Dal Stuffed Parathas


Take two classic Indian staples and combined them to make something wonderful: Dal stuffed parathas. Parathas can be stuffed with anything, so long as it is a bit mushy but not liquidy. This time we stuff with a spicy toor dal. It makes for a great snack, appetizer, or light entree. The paratha dough is super easy to work with, don't hesitate, stop by your local Asian/Indian market and make this today!

For the Toor Dal:
1 cup Toor Dal (yellow lentils) - you may subsitute other lentils if you like.
1/4 teaspoon turmeric powder
2 tbsp vegetable oil
1 medium onion, finely chopped
1 clove garlic, minced
1 inch of ginger, peeled
1/2 teaspoon mustard seed
1/2 teaspoon ground cumin
1/2 teaspoon ground coriander
1 teaspoon garam masala*
1/2 teaspoon hot pepper flakes
1/2 cup chopped tomato (canned or fresh)
salt and pepper to taste

Rinse and clean the lentils.
In 4 cups of water, bring the lentils and the turmeric to a boil.
Lower heat and simmer for 25 minutes or until the lentils are fully cooked and most of the water is absorbed, and the lentils are very 'mashable'. (Add more water if necessary.) Set aside.
Heat oil in a skillet over medium flame.
Add the onions, garlic, mustard seeds, and ginger. Sautee until the onions are translucent.
Mix in the cumin, coriander, garam masala and hot pepper.
Add the chopped tomato, and cook for 1 minute.
Pour the cooked lentils into the skillet. Cook, stirring until the mixture has a thick mushy consistency, adding water if necessary.
Add salt and pepper to taste. Remove ginger and discard.

For the paratha dough:
2 cups atta flour
2 tablespoon vegetable oil
1 tsp salt
water
1/2 cup atta flour for working surfaces
additional oil for pan frying

In a large bowl, mix the flour with the oil and salt.
Add enough water to the mixture to create a firm dough. (Start with 1/2 cup water and add more as necessary.)
Knead until well combined.
Allow the dough to rest under a moist teacloth for 20 minutes.


For the stuffed paratha:
Tear off a piece of dough (about 1/8 of dough) and shape into a ball.
On a floured surface, with a floured rolling pin, roll out the dough into a thin disc about 8 to 10 inches across.
Spoon 2 to 3 tablespoons of dal filling into the center.
Fold over one edge of the dough around the stuffing, fold another adjacent edge and pinch together the edges so that they stick.
Continue folding around the filling and pinching until the dough is totally sealed. Gently pat down to make a round fat disc.
With the rolling pin, very gently flatten the disc further, making sure not to tear the dough.
Heat a skillet over medium flame. Place paratha in the skillet seam side down. Drizzle oil in the pan around the paratha and shimmy the pan so that the oil seeps underneath the paratha. Let cook for 1 minute and flip.
Continue cooking and flipping until both sides are evenly browned. Set paratha aside on paper towels.
Repeat above for the rest of the dough.

Makes 8 stuffed paratha.

* Garam masala is a spice blend common to many tasty Indian dishes. Atta flour is a type of whole wheat flour used for many kinds of Indian breads; Both are very affordable and can be found at your local Indian or Asian market (check one out, most areas have at least one). Any brand should be suitable.


Sweet Lassi


Usually we go for the mango lassi when we dine at Indian restaurants, and it's always so tasty we never think to try anything else. On a whim, I tried the sweet lassi, and wow! With a hint of rosewater, this lassi soon became my favorite. Just 4 ingredients, it's super easy and very refreshing! Goes great with Dal Stuffed Parathas.

1 1/2 cups lowfat plain yogurt
1 cup ice water
1/2 cup evaporated cane sugar (or to taste, use less if using regular sugar)
5 drops rosewater (or to taste)

Process all ingredients together in a blender. This makes about 3 cups of lassi.


Sunday, March 11, 2007

Hummus and Pita Chips

My office is very close to a Moby Dick's, a local kabob chain, which serves some pretty fabulous hummus. As my luck would have it, the Washington Post did a feature on the local chain with a quick hummus recipe. While the recipe called for canned chickpeas, we decided to take the long road, and try our hand at soaking the beans ourselves, using the printed recipe as a guide. I must say, using dried beans does make a difference in taste, and is well worth the time to soak and cook. Many cooks use baking soda in their soak water to quicken the soaking time, but according to this site, adding baking soda (sodium bicarbonate) to your soak breaks down B vitamins like thiamin in the final product. These are important things to consider, especially if you are vegetarian. The resulting hummus was so flavorful, and a good amount thicker than the hummus from Moby Dick's. I suspect more olive oil, and using some of the bean cooking water would have helped thin it out, but the hummus was so tasty, we opted to just stick with our thick hummus creation. Instead of plain pitas for dipping, we toasted up some simple garlic pita chips. They are so cheap, tasty, and easy to make, I can't justify spending money on the packaged pita chips.

Hummus

1 lb dried chickpeas (garbanzo beans)
2 cloves garlic
1/2 cup fresh lemon juice
2 tablespoons tahini
1 teaspoon kosher salt
1 cup olive oil
kalamata olive and paprika (optional garnish)

Pick over chickpeas to remove any shriveled or broken ones as well as foreign matter such as dried soil or pebbles, then rinse and drain.
Place chickpeas in a large bowl, and cover with water, enough so that the beans are about 3 inches below the water surface.
Soak chickpeas overnight. Drain and replace water halfway through soak.
Drain chickpeas and place in a large pot. Fill pot with water enough so that the beans are at least 5 inches below the water surface.
Bring the pot to a boil and let boil for a few minutes.
Lower heat and let the beans simmer for about an hour and a half (or until they are soft, and fully hydrated).
With a food processor or immersion blender, pulse the garlic until it is coarsely chopped.
Drain the chickpeas. Add the chickpeas, tahini, salt and lemon juice and process until smooth. With the motor running, add the olive oil in a steady stream until well combined. Add more salt to taste, if desired.
To serve, transfer to a bowl and top with a sprinkle of paprika and the olive, if desired.

Makes a little more than 4 cups of very thick hummus.

Pita Chips

3 large thin pitas (largest, thinnest you can find)
1/3 cup olive oil
1 teaspoon garlic powder
1/2 teaspoon salt

Preheat oven to 400 degrees.
Mix olive oil, garlic powder and salt in a small bowl.
Brush the olive oil mixture on both sides of a pita. Cut pita into wedges or whatever shape you want your chips to be.
Lay them on an ungreased baking sheet.
Bake in oven for about 4 minutes, turn the chips over, and return to the oven for 4 more minutes or until toasted and crunchy, but not burned. (Thinner pitas may take less, thicker pitas may take more)
Repeat with the brushing, cutting, baking with the other 2 pitas.


Sunday, February 25, 2007

Mini Deep Dish Pizzas and Garlic Knots

Being the pizza fans that we are, but living in Northern Virginia, we have no choice but to make our own deep dish pizzas. Deep dish pizza can be quite the messy mammoth meal. To make things less messy, less mammoth, without buying fancy deep dish pans, I thought it would be interesting to try it in a muffin pan. For one pizza dough recipe, we made our mini deep dish pizzas and also garlic knots. These mini pizzas make it easy to make pizzas of different toppings with no 'contamination' for picky eaters. We used a whole wheat pizza crust to make things healthier, but you may use any crust recipe you like. The pizza sauce recipe is adapted from my good friend and ex-roommate Catherine, who learned it from her dad who used to work in a pizza joint when he was younger.

Mini Deep Dish Pizzas

2/3 recipe of pizza dough (recipe below)
approx 1 cup all-purpose flour (for working with dough)
1/4 cup corn meal
4 tbsp olive oil (for greasing muffin tin)
2 tbsp olive oil or leftover garlic knot oil (for brushing crusts)
3/4 cup of pizza sauce (recipe below)
1 1/2 cups shredded mozzarella cheese
1 1/2 cups total of whatever toppings you like - we used onion, olives, green peppers, mushrooms and fresh basil.

Preheat oven to 425 degrees.
Liberally grease the muffin tin with the olive oil, and dust with the cornmeal.
Divide dough into 12 several sized balls. (Our muffin pan had 12 cups, adjust for your own if you have different)
On floured surface, roll out each ball into circles, about 1/8" to 1/4" thick.
Gently press the dough circles into the muffin cups, making sure the crust is pushed up the sides. Cut away excess dough if your dough circles overflow the muffin cups.
Brush edges of crusts with remaining olive oil.
Layer mozzarella cheese, then toppings, and then sauce into the mini pizzas.
Sprinkle a little parmesan cheese on top. (optional)
Bake for 18 minutes or until the crust is golden.

Makes 12 mini deep dish pizzas.
Garlic Knots

Call me silly, but I hadn't heard of garlic knots until just last year, at a pizza joint in Maryland called Mama Lucia's. Kevin being a long-time fan of pizza knots demanded we order some, and maybe it was the combination of hunger and the fact that they gave them to us for free made them taste so good. Even so, I knew I could make better pizza knots, here's my version.

1/3 recipe of pizza dough
approx 1/4 cup all-purpose flour (for working with dough)
1/4 cup extra virgin olive oil
1 1/2 tsp garlic salt
1 tsp dried oregano
1 tsp parseley
1/4 cup shredded parmesan cheese

Preheat oven to 425 degrees.
Tear off a piece of dough, enough to make a 1/2" ball. On a floured surface, roll the ball into a rope about 1/4" in girth, 6" in length. Tie rope into a knot, and place on a olive oil greased (or parchment lined) baking sheet. Repeat until all dough is used.
In a small bowl, mix the olive oil, garlic salt, oregano and parsely. Brush or drizzle the olive oil mixture onto the knots.
Bake 8 to 10 minutes, or until the knots are lightly browned.
Immediately after removing knots from the oven, sprinkle the parmesan cheese over the knots.
Let cool for a few minutes before serving. Serve alongside heated pizza sauce for dipping.

Makes about 2 dozen knots.

Pizza Dough

The recipe we've come to love is adapted from Allrecipes.com. It's actually a very versatile dough, just be warned that the dough can bake up thick if you don't roll it out thin enough to start!

So for reading ease, here's the recipe with my adaptations.

1 tsp evaporated cane sugar
1 1/2 cups warm water (110 degrees F/45 degrees C)
1 tablespoon active dry yeast (or 1 packet of active dry yeast)
3 tablespoon olive oil
1/2 tsp garlic salt
1/2 tsp salt
1 tsp basil
1 tsp oregano
2 cups whole wheat flour
1 1/2 cups all-purpose flour

In a large bowl, dissolve sugar in warm water. Sprinkle yeast over the top, and let stand for about 10 minutes, until foamy.
Stir the olive oil, garlic salt, salt, basil and oregano into the yeast mixture, then mix in the whole wheat flour and 1 cup of the all-purpose flour until dough starts to come together.
Tip dough out onto a surface floured with the remaining all-purpose flour, and knead until all of the flour has been absorbed, and the ball of dough becomes smooth, about 10 minutes.
Place dough in an oiled bowl, and turn to coat the surface. Cover loosely with a towel, and let stand in a warm place until doubled in size, about 1 hour.
When the dough is doubled, tip the dough out onto a lightly floured surface, and divide into 2 parts. 1/3 for the garlic knots, and 2/3 for the pizzas.
Form dough into tight balls. Let rise for about 45 minutes, until doubled.

Pizza Sauce

1 6-oz can of tomato paste
1 8-oz can of tomato sauce
1 tsp oregano
1 tsp basil
1 tsp garlic salt
A few grinds of black pepper

Mix all ingredients, adding a little water if the sauce is too thick. (We don't usually add any water)